How to Sample Log Home Stain
Tips To Help you try our stain samples on your home
Your dream log home isn’t that far off.
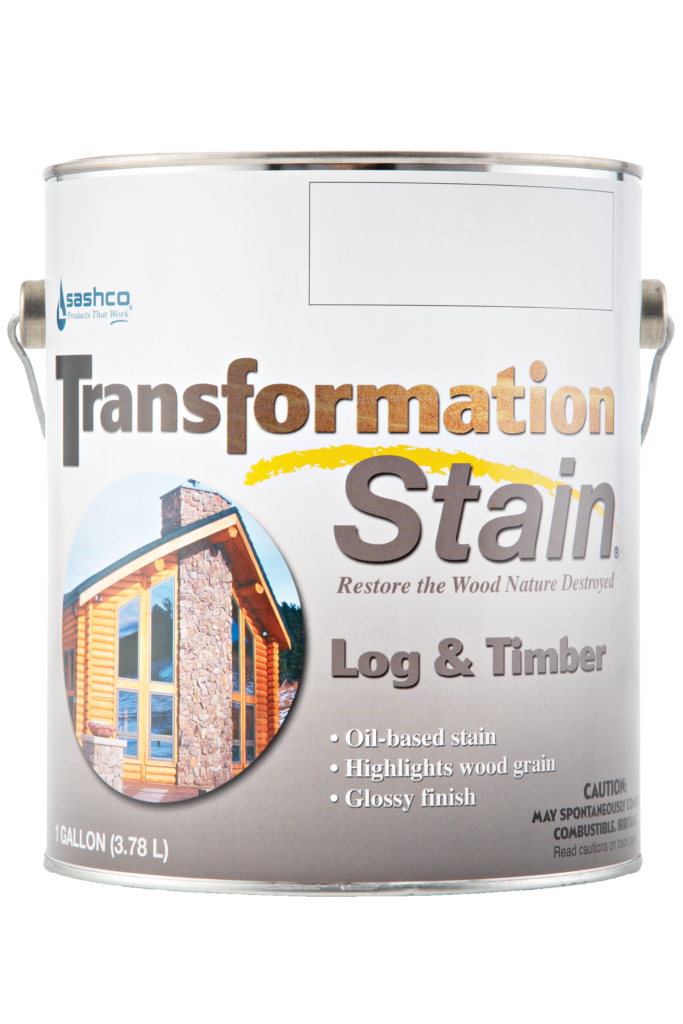
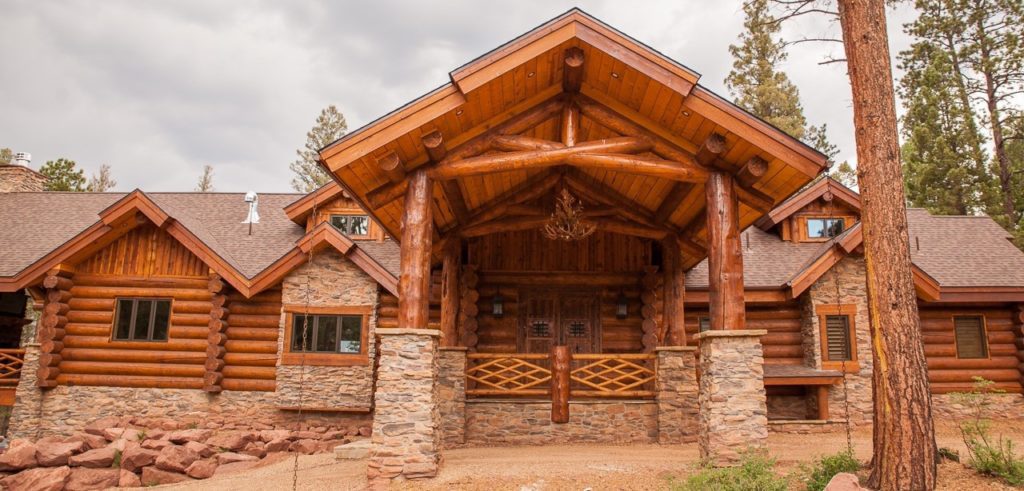
Proper application of log home stain samples is the only way to make sure you get the color you want the first time. Case in point, this beautiful log home stained with Sashco’s Transformation Log & Timber stain. Shopping from a log stain color chart is a bit like shopping from a catalog. What if it doesn’t look like the picture? Can I return it if I don’t like it?
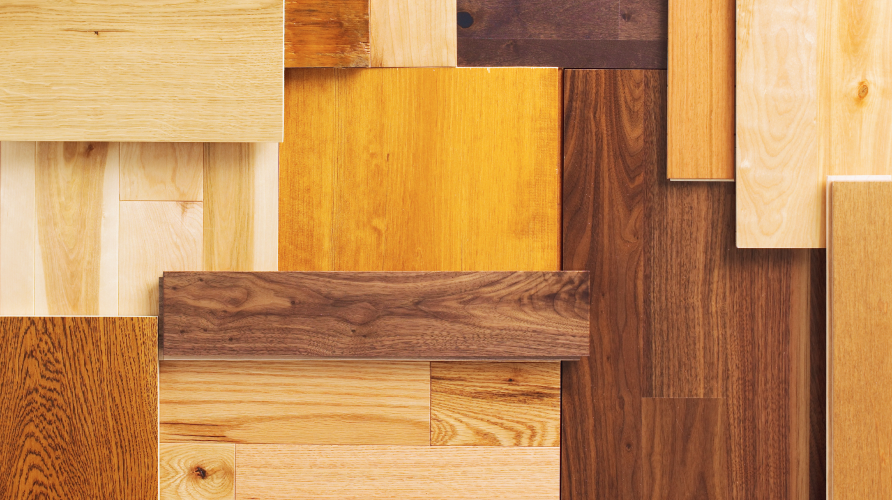
The Type of Wood Matters
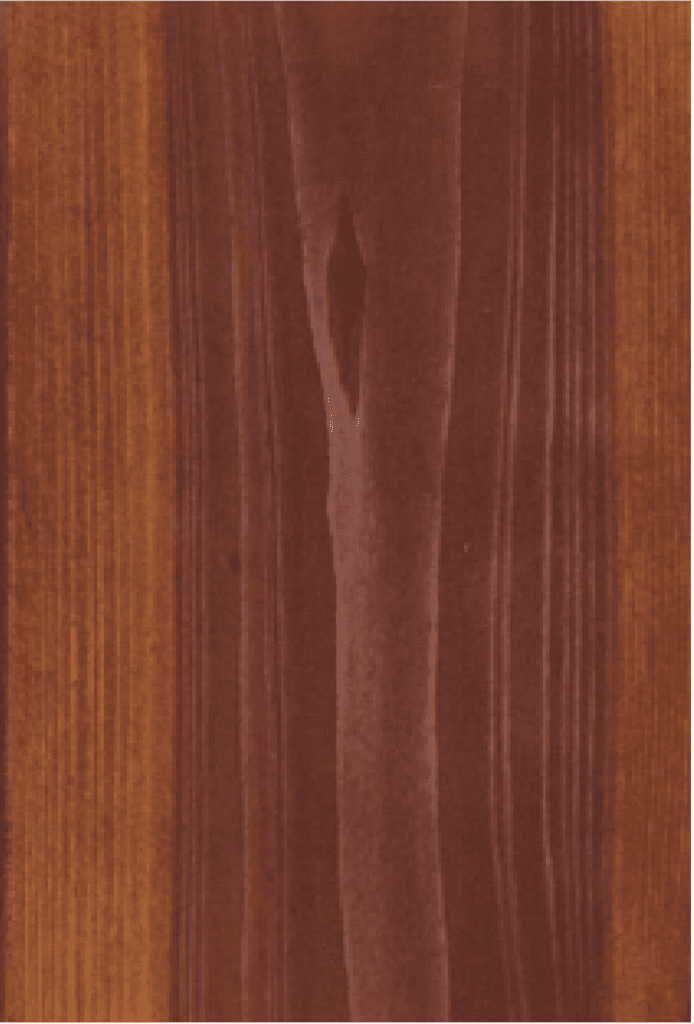
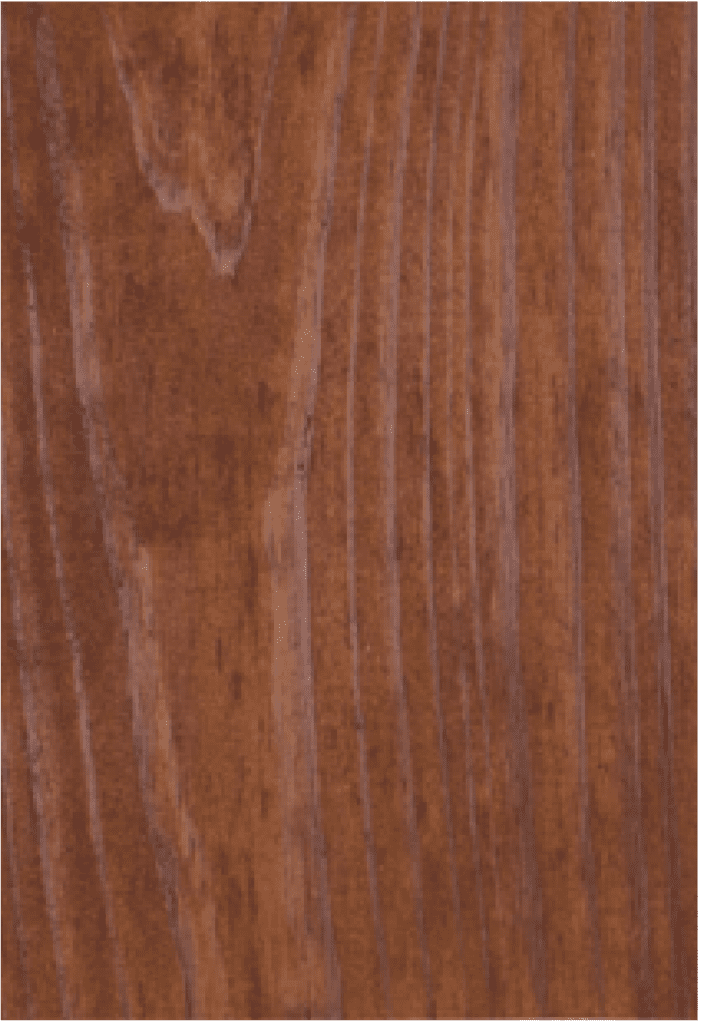
With log home stains, the same stain can look vastly different on various species and ages of wood. Most likely, the color chart you used showed stain that was applied to new white pine. But, when applied to 50-year-old oak, the stain looks completely different.
Take a look at Images A, B, and C below. Would you believe that each image shows the same color of stain? All three pieces of wood are stained with Sashco’s Transformation Siding & Trim in Brown Tone Medium. The only difference is the wood: Image A is Redwood, Image B is Pressure Treated Wood, and Image C is Pine.
The Wood Prep Method Also Plays a Role
Not only does the type of wood affect how the stain will appear, but different preparation and application methods will also affect the final result. Power-washed logs, hand-sanded logs, and media blasted logs will all soak up the stain differently.
Different wood prep types affect the final stain color.
The image below illustrates how wood prep affects the final stain. From the top:
- Media blasted logs (no finish sanding)
- Media blasted logs, finish sanded with Buffy Pads
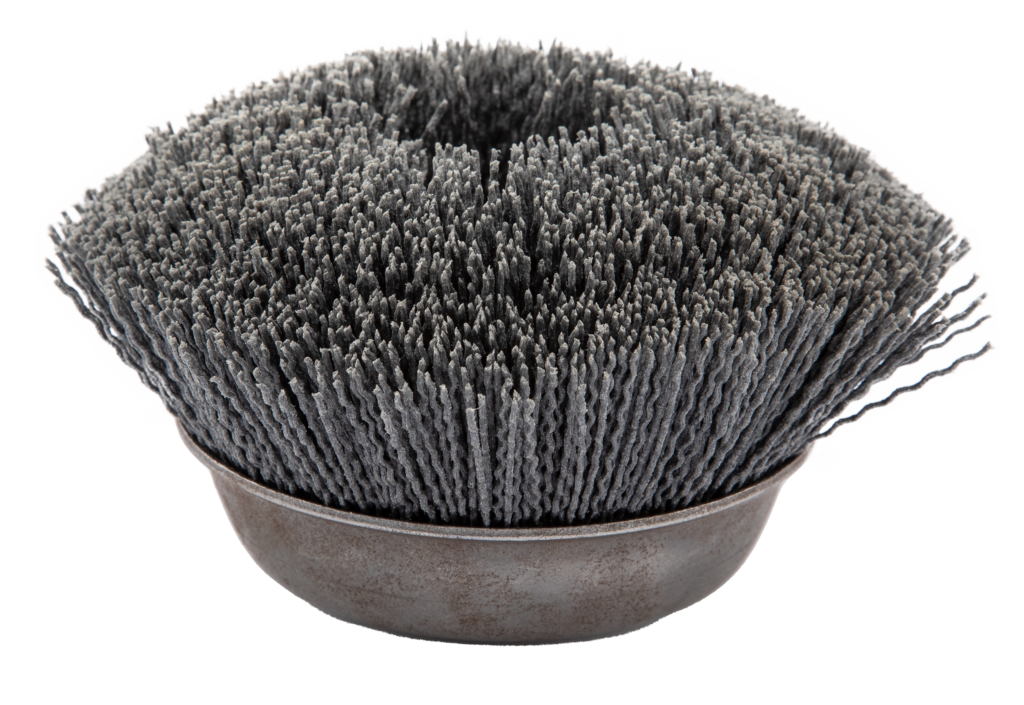
- Power washed logs, finish sanded with Osborn® brushes
- Power washed logs (no finish sanding)

So, we’re shouting it from the rafters: put the paint brush down and sample first!
Here’s How to Apply Stain Samples the Right Way
1. Pick a spot on your home
Listen up: a scrap of wood won’t do. Your home’s unique texture and color will affect the final outcome, so do this sample on the home itself. In a small, inconspicuous test area, perform each step the way you will on the entire home. We recommend a space that is, at a minimum, 2 sq.ft. This way, you get a good idea of what the stain will look like on the whole home.
2. Prepare the wood
Do you plan to power wash? Power wash your sample area. Do you plan to media blast? Media blast your sample area. (Yes, it’s extra work, but it will be worth it when the sample and the home turn out the same.)
3. Mix the pre-stain base coat and stain samples thoroughly
Sorry, folks, but a stir stick just won’t do the trick. There are many ingredients in a semi-transparent stain that tend to sink to the bottom of the container, including the pigments. It’s important to scrape all of those pigments off of the bottom and thoroughly mix them in to see the true color. It might be helpful to pour the sample into a spare container (metal or glass for Transformation Log and Timber samples; plastic, metal, or glass for Capture Log Stain and Transformation Siding and Trim), scrape all of the pigments in, and mix away for a few minutes. A kitchen whisk or hand-held mixer is a great tool for mixing.
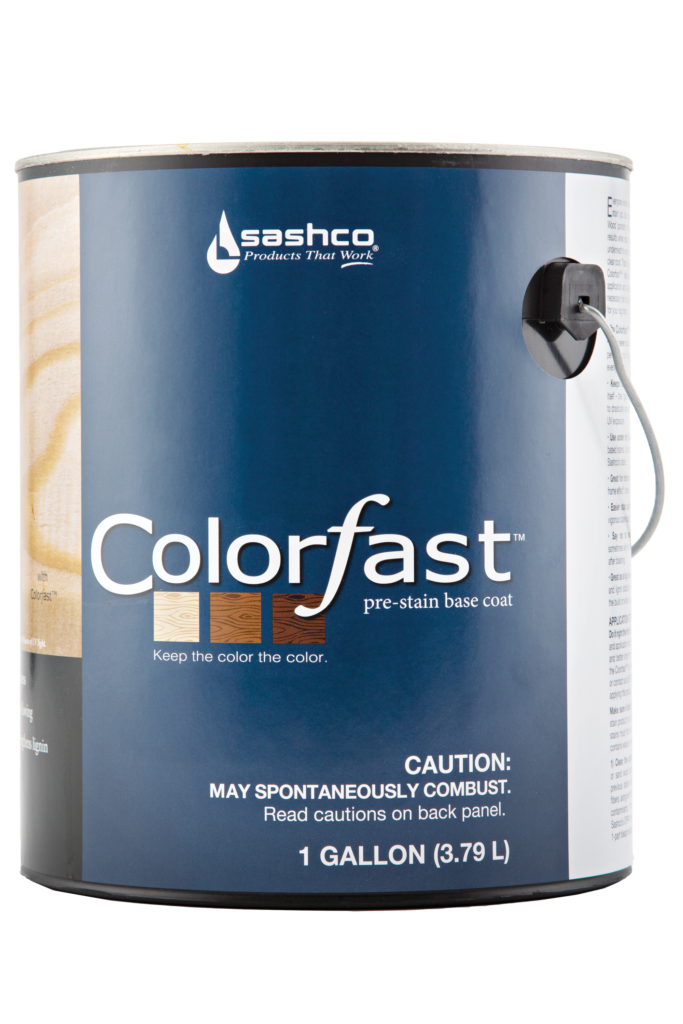
4. Apply Colorfast pre-stain base coat
If you plan on using Colorfast under your stain, apply one coat and allow to thoroughly dry. Colorfast will affect the final color appearance, so it needs to be sampled just like the stain.
5. Apply the first coat of stain
When applying your stain, make sure whatever method you use is the same method you use when you do the actual project. We recommend spraying on and back-brushing all of Sashco’s stains. If you’re brushing on the stain, don’t skimp! Really drench wood with stain when applying.
6. Apply the second coat of stain
After the first coat dries thoroughly, apply the second coat of stain. Follow directions for the product you’re using. Usually, the second coat is a lighter coat designed to even out color and gloss.
7. Let the stain dry
Did we already say this? We’ll say it again. Allow all coats to dry in between. Wet-on-wet stain always looks different than dry stain, so it’s important to let stain fully dry between coats and after to allow the color to fully develop, penetrate, and show you the true color.
8. Don’t forget a top coat!
With Sashco’s Capture, you must use the Cascade clear top coat. The final look will be different with the top coat, so apply everything in order to get the real scoop.
Pro Tips
If you’re working with a contractor, he or she will likely do this sampling for you. Make sure you’re both on the same page when it comes to the final look you want to achieve. Don’t allow the contractor to stain until you have thoroughly discussed and demonstrated the look you want. This means it’s best if you can be on-site during the staining process (at least at the beginning).
Need help finding a log home finishing contractor? Good news, we have you covered! This is not another list of every contractor who has ever looked at a log home. This is a list of contractors who specialize in log home finishing and restoration.
So there you have it! You’re well on your way to making sure the beautiful, dream log home picture in your mind’s eye becomes reality.
For more staining tips (and FREE stain samples!) schedule a call with the experts at Sashco, or visit your local Sashco retailer.
At Sashco, we know that logs ain’t wood. So whether your’re finally building your dream home, looking to do some routine maintenance to keep your weekender log cabin looking beautiful, or in need of a complete log cabin renovation and restoration, we’re here to help with a full line of specialty log home finishing products.
Order Stain Samples
We make stain selection simple with curated colors and everything you need to create a log home you love, delivered.
Inspiration Gallery
Need help selecting the right log stain color for your dream home? Here’s a little inspiration.
Where to Buy
Find dealers near you and see which online retailers sell Sashco by visiting our Where to Buy page.
Find a Contractor
Need help finding a log home contractor? Visit our directory of pros who specialize in log home finishing and restoration.
Request A Free Stain Sample
Don’t surrender your fate to an online color chart. Order your free stain samples today.